
안녕하세요. 후르륵짭짭입니다.
이번에는 PropertyWrapper에 대해서 알아보려고 합니다.
SwiftUI를 사용하다 보면 @ViewBuilder , @Binding 등 "@"가 들어가는 anotation을 볼 수 있습니다.
이런 것들이 PropertyWrapper라고 하는데, 공통적인 로직을 처리할 때 사용하면 좋습니다.
** PropertyWrapper를 사용하는 방법 **

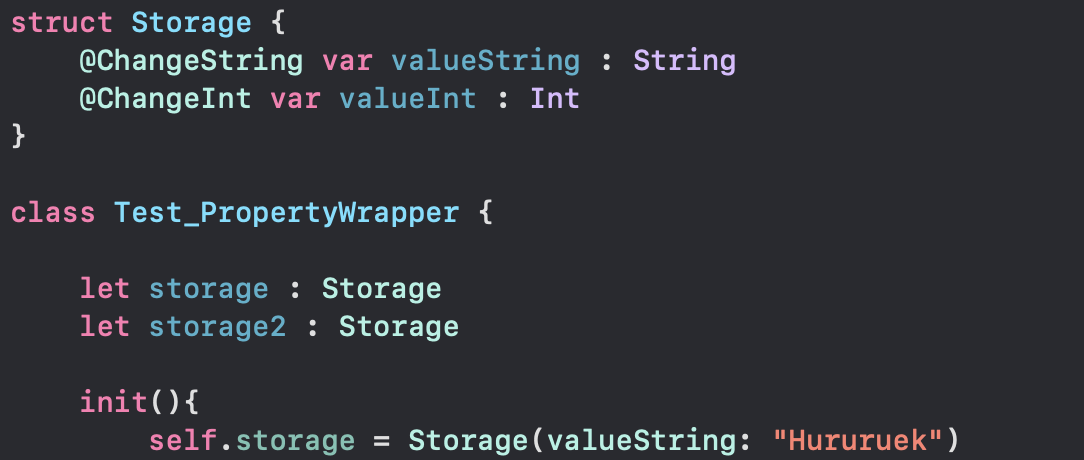
위 사진 처럼 Struct나 Class와 같은 Instance에 @propertyWrapper를 붙여 주면 "wrappedValue"가 없다는 오류가 나오게 됩니다.
그러면 Fix를 눌러주면 wrappedValue가 생기게 되고 Value 부분에 원하는 타입을 넣어주면 됩니다.
@propertyWrapper
struct ChangeString {

    var wrappedValue: String

    init(wrappedValue: String) { //이름도 무조건 WrappedValue로 해야한다.
        self.wrappedValue = wrappedValue
    }

}
위와 같이 propertyWrapper 구조체를 만들었다면
사용하고자 하는 곳에 @를 붙이고 변수를 선언해주면 됩니다.
그리고 위에 이미지 처럼 ChangeString에 타입이 String이지만 초기값을 설정하지 않았다면
인스턴스 사용시 valueString을 선언하라고 나옵니다.
@propertyWrapper
struct ChangeInt {

    var wrappedValue: Int = 0.

    init() {} //Compute Property로 되어있고 초기값 설정도 되어 있고 새로운 init이 있다면 init(){}을 해줘야 컴파일 오류가 발생안한다.

    }
반면 ChangInt 처럼 wrappedValue에 초기값이 설정 되어 있다면 init 시 생성할 필요가 없어 집니다.

오히려 초기값을 설정한 valueInt 값을 바꾸려고 한다면 오류가 발생합니다.
** PropertyWrapper의 특수 기능 **
@propertyWrapper
struct ChangeInt {
    private var number : Int = 0
    private(set) var projectedValue : Bool = false //값이 변했는지 아닌지 알려주는 것을 외부에서 $로 통해 접근가능하다

    var wrappedValue: Int {
        get{
            return number
        }
        set{
            if newValue == 0 {
                self.projectedValue = false //이렇게 분기로 구분해줘야한다.
            }
            else{
                number += newValue
                self.projectedValue = true
            }

        }
    } //Compute Property로 구현되어 있다면 초기값 설정이 되어 있다고 생각한다. (물론 값이 들어 있는지 체크한다.)

    init() {} //Compute Property로 되어있고 초기값 설정도 되어 있고 새로운 init이 있다면 init(){}을 해줘야 컴파일 오류가 발생안한다.

    init(wrappedValue : Int , add : Int){
        self.wrappedValue = wrappedValue + add
    }

}
- 두개 이상의 인자를 받는 경우 -
PropertyWrapper는 두개의 인자를 받을 수 있습니다 .
@propertyWrapper
struct ChangeInt {

    ,,,

    init(wrappedValue : Int , add : Int){
        self.wrappedValue = wrappedValue + add
    }

}

@ChangeInt(wrappedValue: 10, add: 30) var valueInt2 : Int
위와 같이 init에 두개 이상의 인자를 받는 경우 init을 생성 해주면 됩니다.
그리고 사용할 때는 @propertyWrapper(인자 N개)를 선언해주면 됩니다.
- 특정 조건에 사용가능한 projectedValue -
PropertyWrapper에 특정 조건에 값이 변경 된것을 고지할 필요가 있을 때 projectedValue를 사용하면 좋습니다.
@propertyWrapper
struct ChangeInt {
    private var number : Int = 0
    private(set) var projectedValue : Bool = false //값이 변했는지 아닌지 알려주는 것을 외부에서 $로 통해 접근가능하다

    var wrappedValue: Int {
        get{
            return number
        }
        set{
            if newValue == 0 {
                self.projectedValue = false //이렇게 분기로 구분해줘야한다.
            }
            else{
                number += newValue
                self.projectedValue = true
            }

        }
    } //Compute Property로 구현되어 있다면 초기값 설정이 되어 있다고 생각한다. (물론 값이 들어 있는지 체크한다.)

,,,

}

print(self.storage.$valueInt) //projectValue를 이렇게 $를 통해 접근가능하다.
그리고 proejectValue는 위와 같이 $로 접근이 가능하다.
여기에서 참고하면 좋습니다 .
https://eunjin3786.tistory.com/472
[Swift] Property Wrapper
[DI] DI Container, IOC Container 개념과 예제 에서 간단하게 Property Wrapper 를 사용했었는데요, Swift Docs > Properties > Property Wrappers 에서 더 자세한 내용들을 알게 되어서 정리합니다 ✏️ # Property Wrapper 전
eunjin3786.tistory.com
** 유동성 Dependency Injection **
Property Wrapper를 사용해서 의존성 주입 관리를 체계적으로 관리 가능합니다 .
매번 새로운 하위 객체를 생성해서 상위 객체에 넣어주는 방법이 아닌,
하나의 객체를 생성하고 필요에 따라서 해당 객체를 반환해주는 방식 입니다.
protocol Injectable {}

@propertyWrapper
struct Inject<T:Injectable> {
    var wrappedValue: T

    init() {
        wrappedValue = DependencyManager.shared.resolve()
    }
}

final class DependencyManager {

    private var storage : [String : Injectable] = [:]

    static let shared = DependencyManager()
    private init(){}

    func add<T:Injectable>(_ injectable : T) {
        let key = String(describing: type(of: T.self)) //String(reflecting: injectable)
        storage[key] = injectable
    }

    func resolve<T:Injectable>() -> T {
        let key = String(describing: type(of: T.self)) //String(reflecting: T.self)
        return storage[key] as! T//injectable
    }

}


struct Repository : Injectable {
    func doSomething() {
        print("Injected Repository")
    }
}
위와 깉이 Inject라는 PropertyWrapper 객체를 생성하는데, Injectable 프로토콜을 준수하고 있는 조건 하에 Generic을 만들어 줍니다.
PropertyWrapper의 T는 선언에 따라서 달라지기 때문에 우리가 넣어주는거에 따라 달라집니다.
@Inject var object : Repository이렇게 Repository가 T가 됩니다!
그리고 DependencyManager에서 add와 resolve를 통해서 객체를 저장 및 가져오는 기능을 만들어 줍니다.
이제 AppDelegate나 의존성을 넣어주는 부분에서
DependencyManager.shared.add(Repository())다음 처럼 넣어주면 끝!!
자세한 내용은 여기에 있습니다.
https://www.kiloloco.com/articles/004-dependency-injection-via-property-wrappers/
Dependency Injection via Property Wrappers | Kilo Loco
Dependency Injection via Property WrappersDependency injection seems to be what all the cool kids talk about nowadays, specifically initializer/constructor based injection. The problem is that it can become challenging as a project begins to grow. Dependen
www.kiloloco.com
** 고정형 Dependency Injection **
위에 같은 경우는 의존성 주입을 유동적으로 할 수 있지만 add 해주는 부분을 또 관리해줄 필요 있습니다.
하지만 이번에는 고정형이지만 DependencyManager에 add 해주는 부분을 고정으로 관리해주는 방법입니다.
@propertyWrapper
struct Injecting<T> {
    private let keyPath: WritableKeyPath<InjectingValue, T>
    var wrappedValue: T {
        get { InjectingValue[keyPath] }
        set { InjectingValue[keyPath] = newValue }
    }
    init(_ keyPath: WritableKeyPath<InjectingValue, T>) {
        self.keyPath = keyPath
    }
}

class InjectingValue {
    private static var shared = InjectingValue()

    private var networkRepo : NetworkRepositoryProtocol?

    /// A static subscript accessor for updating and references dependencies directly.
    static subscript<T>(_ keyPath: WritableKeyPath<InjectingValue, T>) -> T {
        get { shared[keyPath: keyPath] }
        set { shared[keyPath: keyPath] = newValue }
    }

}

extension InjectingValue {
    var networkRepository : NetworkRepositoryProtocol {
        get{
            if networkRepo == nil {
                self.networkRepo = NetworkRepository()
            }
            return self.networkRepo!
        }
        set{
            self.networkRepo = newValue
        }
    }
}

protocol NetworkRepositoryProtocol {
    func printHelloWorld()
}


struct NetworkRepository :NetworkRepositoryProtocol{

    func printHelloWorld(){
        print("Hello World")
    }
}
위 방식은 Keypath와 Subscript를 이용한 방법이기도 합니다 .
@Injecting(\.networkRepository) var networkRepository : NetworkRepositoryProtocol
KeyPath를 통해 Property에 접근하는 것이고 해당 Property에서 객체를 가지고 있으면 반환하는 방식입니다.
자세한 내용은 다음 블로그에 정리 되어 있습니다.
https://www.avanderlee.com/swift/dependency-injection/
Dependency Injection in Swift using latest Swift features
Dependency Injection using latest Swift features allows you to mock data, and write tests easily without 3rd party dependencies.
www.avanderlee.com
** 참고 사이트 **
IOC 개념
https://eunjin3786.tistory.com/233?category=837198
[DI] DI Container, IOC Container 개념과 예제
곰튀김님의 Inversion 세션 (let us go summer 2020 => 2:18:19 쯤 나와요! 👍) 을 보다가 Dependency Container를 공부해보고자합니다. Dependency Injection의 개념 & SOLID의 D인 의존관계 역전 원칙(DIP)을 어떻게 따르게
eunjin3786.tistory.com
PropertyWrapper Dependency Injection
https://medium.com/swift2go/dependency-injection-with-property-wrappers-1a8a07a4124c
Dependency injection with property wrappers
Feel the relief of one less third-party library — tested.
medium.com
KeyPath
https://ios-development.tistory.com/839#recentComments
[iOS - swift] KeyPath, WritableKeyPath, ReferenceWritableKeyPath, DynamicMemberLookup 개념
KeyPath 특정 속성에 대한 path정보를 가지고 있는 key값 (KeyPath 인스턴스를 통해 해당 값에 접근이 가능) // KeyPath 문법: `\`키워드 + 유형 + 프로퍼티 이름 let nameKeyPath: KeyPath = \Person.name let person = Person
ios-development.tistory.com
'Xcode > Swift - PlayGround' 카테고리의 다른 글
| Swift) AsyncStream 정리하기 (feat: Sequence, IteratorProtocol) (0) | 2023.07.24 |
|---|---|
| Swift) Async - Await 정리하기 #2 (Async let, withTaskGroup, Task) (0) | 2023.06.12 |
| PlayGround) Combine 체험기#2 (0) | 2023.01.08 |
| PlayGround) Framework UnitTest 생성 해보기 (0) | 2022.12.17 |
| PlayGround) Framework 생성 모듈화 작업 #2 (0) | 2022.12.04 |


댓글