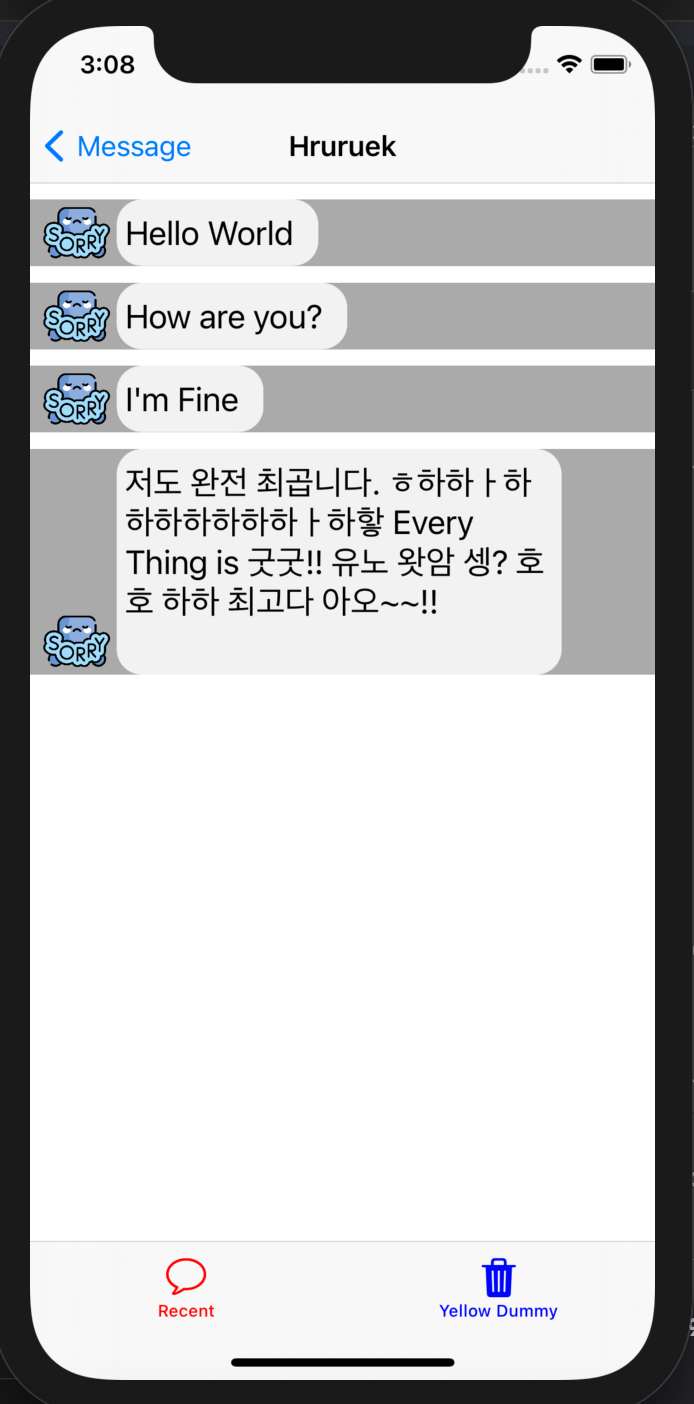
안녕하세요 후르륵짭짭 입니다.
이번에는 문자열의 길이에 따라 Cell의 크기를 다르게 해주는 방법에 대해 알아 보도록 하겠습니다.
그런데 아직 확실한 내용이 아니기 때문에,,,, 쫌 많이 걸러 들을 필요가 있습니다.
제가 그냥 어림 진작 해본 것 이기 때문이에요.
** boundingRect에 대해 알아보자 **

BoundingRectWithSize는 특정한 사각형(Size)이내에 입력값으로 준 Option과 NSString으로 사각형을 계산해서 반환 해주는 것을 의미한다고 Apple Document에 적혀 있습니다.
그러면 이걸 어떻게 사용하냐면,,, 입력값이 NSString으로 만들어 줍니다.
NSString(string: messageText).이렇게 NSStrign 안에 원하는 text를 넣어주고
let estimatedFrame = NSString(string: messageText).boundingRect(with: maxSize, options: heightOnFont, attributes: [.font: UIFont.systemFont(ofSize: 20)], context: nil)이렇게 boundingRect를 사용해주면 됩니다.
그런데 여기서 with : CGSzie , option : NSStringDrawingOptions , attributes : NSAttributedString.Key 를 설정해줍니다.
with은 위에서 말하는 Specified Rectangle 입니다.
그래서 Specified Rectangle은 최대 공간이라고 생각하면 됩니다.
이 공간 안에 입력값으로 준 messageText를 일단 그려버리는 겁니다.
따라서 아래 코드로 maxSize를 specified Rectangle로 지정 해준 겁니다.
let maxSize = CGSize(width: 250, height: 1000)이제 option을 보도록 하겠습니다.
option은 어떤 기준으로 어떻게 그려갔으면 좋겠는냐?에 대한 물음 입니다.
let heightOnFont = NSStringDrawingOptions.usesFontLeading.union(.usesLineFragmentOrigin)이렇게 해주고 제가 아는 부분만 적어 가도록 하겠습니다.
* UseFontLeading = Uses the font leading for calculating line heights. = 행 높이를 계산할 때 글꼴 행간을 사용한다
즉, text의 높이를 계산해주는 것 입니다.
그리고 union을 해주면 option을 추가해줄 수 있습니다.
* usesLineFragmentOrigin = Uses the line fragment origin instead of the baseline origin. = 기준선 원점 대신 선 조각 원점을 사용합니다.
이게 먼 소리냐,,,, 저도 이게 무슨 소린지 잘 몰라서 열심히 찾아 봤는데,,,
( stackoverflow.com/a/28362986/13065642 여기에 자세한 설명이 있습니다. )
If NSStringDrawingUsesLineFragmentOrigin is specified in options, it wraps the string text as needed to make it fit. If the string is too big to fit completely inside the rectangle, the method scales the font or adjusts the letter spacing to make the string fit within the given bounds.

If NSStringDrawingUsesLineFragmentOrigin is not specified in options, the origin of the rectangle is the baseline of the only line. The text will be displayed above the rectangle and not inside of it. For example, if you specify a rectangle starting at 0,0 and draw the string ‘juxtaposed’, only the descenders of the ‘j’ and ‘p’ will be seen. The rest of the text will be on the top edge of the rectangle.
이 설명을 보면 NSStringDrawingUsesLineFragmnetOrigin이 옵션으로 사용 된다면, 이건은 문자열을 분해하고 그 사이즈에 맞게 해줍니다. 만약 문자열이 사각형에 담기에 너무 크다면 주어진 사각형에 맞도록 문자열의 간격을 조절합니다.
만약 옵션으로 사용되지 않는다면, 오직 문자열에 기준선이 사각형의 기준이 됩니다. 그래서 내부의 글은 안 보이고 일부분만 보이게 됩니다.
예를들어 0,0에서 시작하는 직사각형을 지정하고 'juxtaposed'문자열을 그리면 'j'와 'p'의 디 센더 만 표시됩니다. 나머지 텍스트는 직사각형의 상단 가장자리에 있습니다.
이렇게 번역을 할 수 있는데,,, 먼소린지 모르겠습니다 ㅎㅎㅎㅎ
그래서 PlayGround에 코드를 적어보면 그 느낌을 바로 알 수 있습니다.
import UIKit
import PlaygroundSupport

var str = "Hello, playground, hahahahahahahahhaahahahahha"

let view = UIView()
view.backgroundColor = .yellow
view.frame = CGRect(x: 0, y: 0, width: 400, height: 400)

let textView = UITextView()
textView.text = str
textView.font = UIFont.systemFont(ofSize: 20)
let maxSize = CGSize(width: 250, height: 1000)
let heightOnFont = NSStringDrawingOptions.usesFontLeading.union(.usesLineFragmentOrigin)
let estimatedFrame = NSString(string: str).boundingRect(with: maxSize, options: heightOnFont, attributes: [.font: UIFont.systemFont(ofSize: 20)], context: nil)
textView.frame = CGRect(x: 0, y: 0, width: estimatedFrame.width + 20, height: estimatedFrame.height + 20)

view.addSubview(textView)

print(estimatedFrame.width)
print(estimatedFrame.height)

PlaygroundPage.current.liveView = view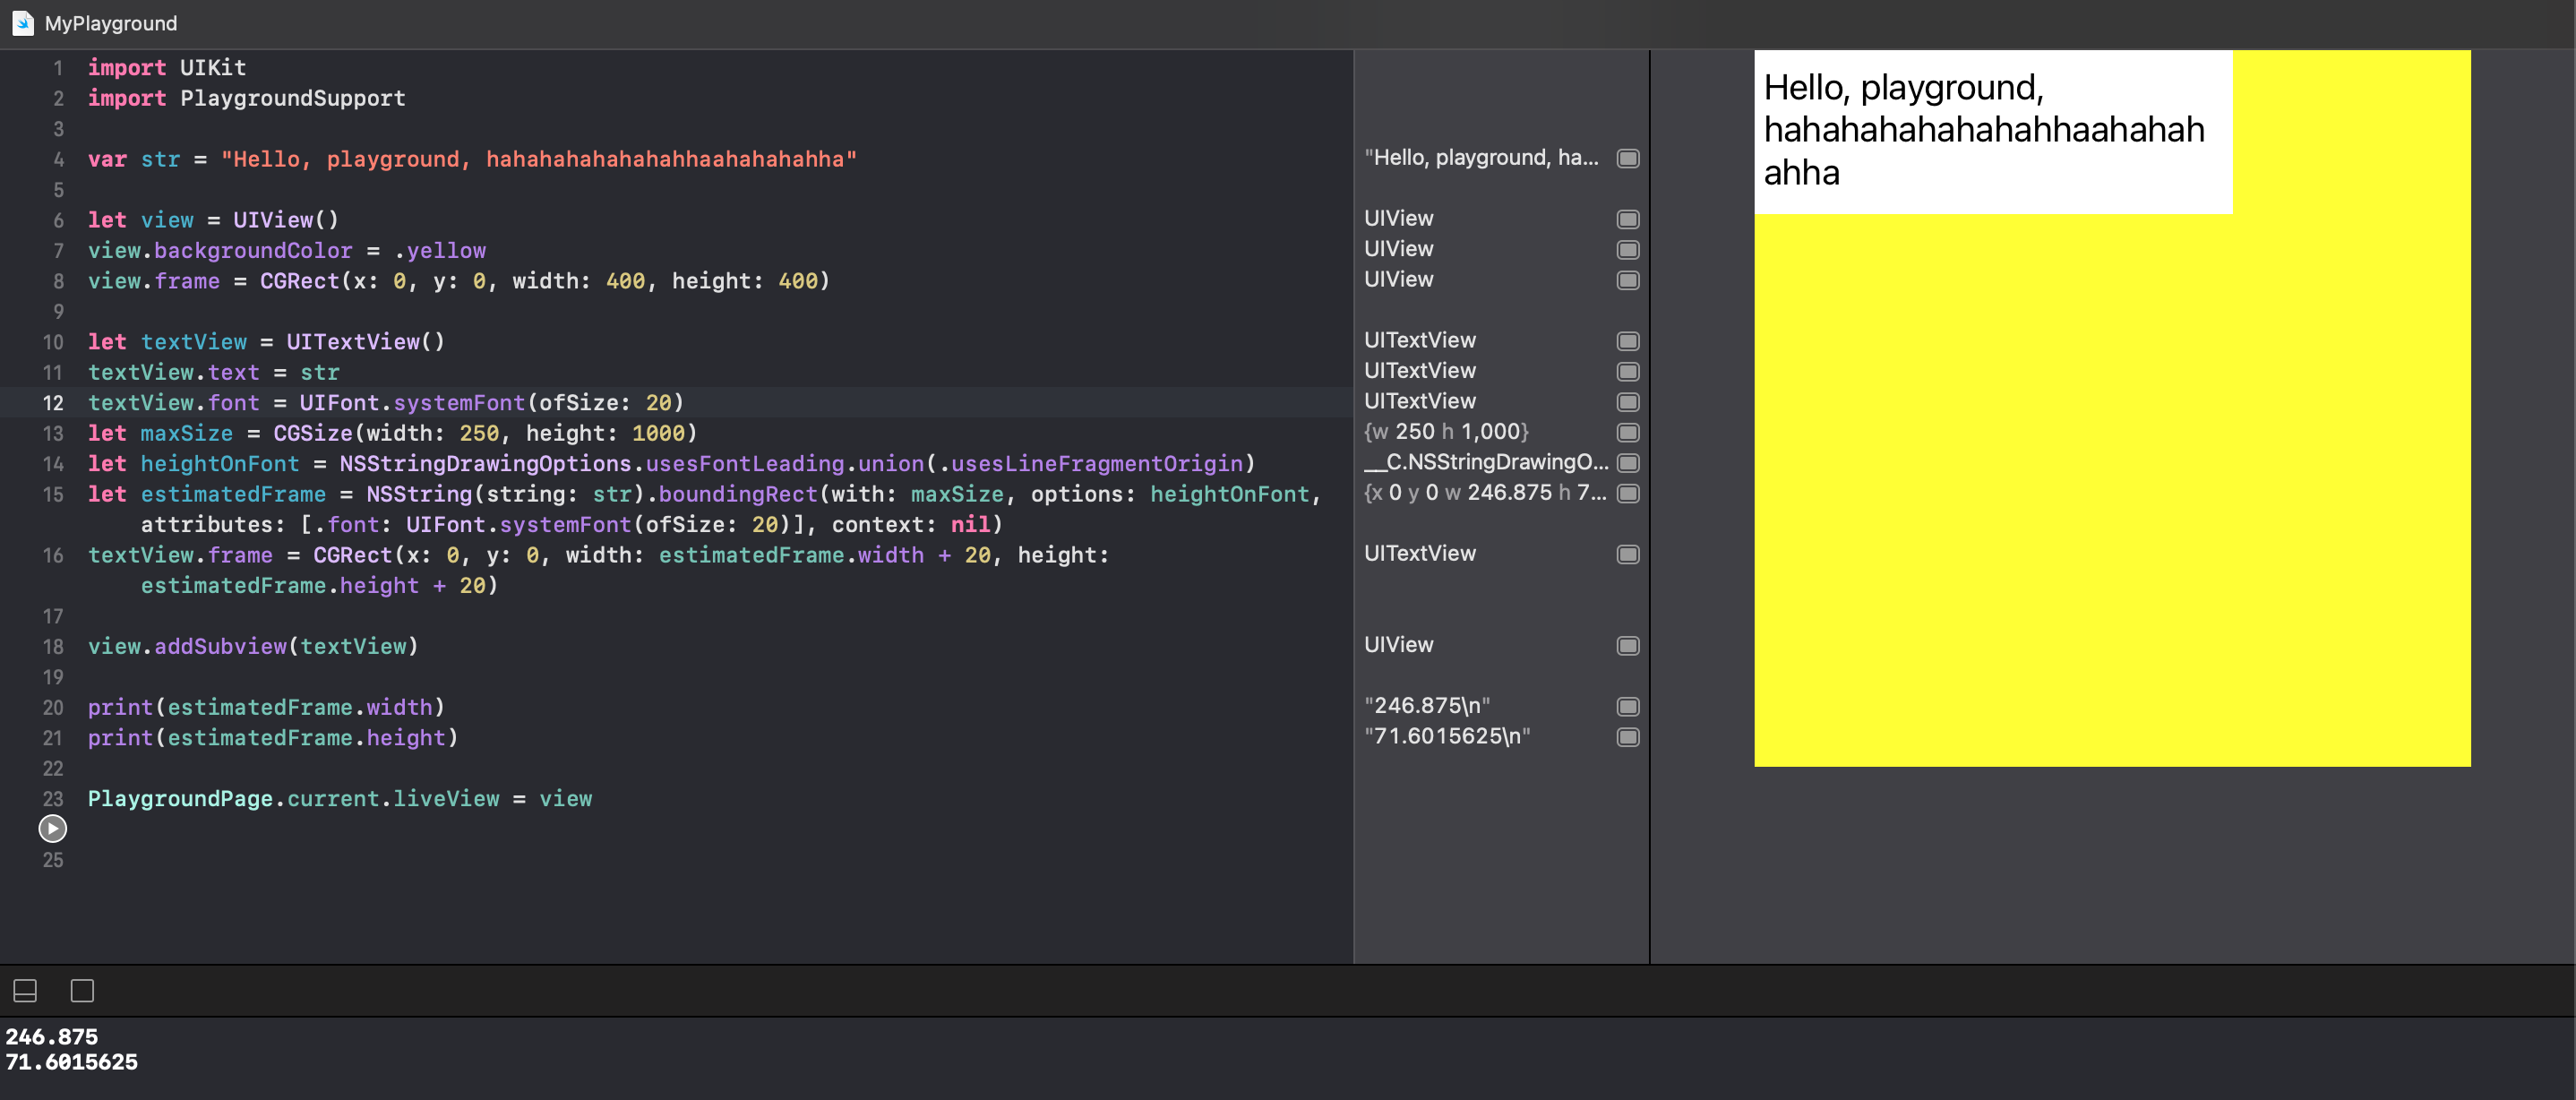
이렇게 leading과 fragmentOrigin을 같이 사용해준다면 사각형 너비를 넘지 않고 동적인 높이를 만들어 줍니다.
(참고로 완벽하지는 않아서 textView.frame에 높이와 너비에 20을 더해 줬습니다.)
만약에 fragmentOriginn을 빼버린다면, 최상단의 문자만 보여주게 됩니다. 정확한 높이를 구하지 못하게 됩니다.

이렇게 Option을 알아봤고 attributes를 보도록 하겠습니다.
여기서 attributes도 중요한데, 이 attributes는 우리가 text에 사용하는 font와 동일하게 해주는 것이 좋습니다.
처음에 입력으로 string만 주는데, 그 string의 특징 같은 것을 넣어주면 그에 맞고 조절 해줘야 하기 때문입니다.
context 부분은 나중에 좀 더 사용해보고 다뤄보겠습니다,,(_ _)
이렇게 기본적인 boundingRect에 대해 알아 봤습니다.
** 동적인 CollectionView Cell 만들기 **

이렇게 DelegateFlowLayout에 위에서 만들어진 BoundingRect해주는데
여기에서는 Cell의 높이만 위한 곳입니다.
너비는 collectionView의 너비를 그리고 높이는 측정한 높이를 반환 해준겁니다.
** 물결모양 view 만들기 **
물결모양 View안에 이제 TextView를 넣도록 하겠습니다.
  //오토레이아웃 적용 ㄴㄴ
    let bubbleView : UIView = {
        let view = UIView()
        view.backgroundColor = UIColor(white: 0.95, alpha: 1)
        view.layer.cornerRadius = 15
        view.layer.masksToBounds = true
        return view
    }()
이렇게 BubbleView를 만들어 주고 우리의 TextView를 bubbleView에 넣고
오토레이아웃을 적용합니다.
 private func setUPtextView(){

        contentView.addSubview(bubbleView)
        bubbleView.addSubview(textView)

        NSLayoutConstraint.activate([
            textView.topAnchor.constraint(equalTo: bubbleView.topAnchor),
            textView.leadingAnchor.constraint(equalTo: bubbleView.leadingAnchor),
            textView.trailingAnchor.constraint(equalTo: bubbleView.trailingAnchor),
            textView.bottomAnchor.constraint(equalTo: bubbleView.bottomAnchor)
        ])

    }
그런데 여기서 봐야할 점이 BubbleView는 오토레이아웃을 적용 안했습니다.
왜냐하면 동적인 ViewFrame을 가져야하기 때문 입니다.

그래서 위에서 사용한 BoundingRect를 다시 사용해서 bubbleView에 사용해줍니다.
이때는 너비를 frame.Width를 사용해서 text의 크기에 맞도록 해줍니다.
이렇게 동적인 CollectionView의 Cell 크기를 만드는 방법에 대해 알아봤습니다.
완벽한 내용을 다루지는 못했지만 참고가 됐으면 합니다.
나중에 다시 업데이트 해보도록 하겠습니다.
모두 즐코 하세요.
참고 사이트 :
Line Fragment 의 대한 내용 :
stackoverflow.com/a/28362986/13065642
Confused by NSStringDrawingOptions item meaning
iOS7 and later, we can use - (void)drawWithRect:(CGRect)rect options:(NSStringDrawingOptions)options attributes:(NSDictionary *)attributes context:(NSStringDrawingContext *)context to calculate the
stackoverflow.com
NSString Drawinnng Context :
developer.apple.com/documentation/uikit/nsstringdrawingcontext
Apple Developer Documentation
developer.apple.com
NSDrawing Option :
developer.apple.com/documentation/uikit/nsstringdrawingoptions
Apple Developer Documentation
developer.apple.com
Bounding Rect :
developer.apple.com/documentation/foundation/nsstring/1524729-boundingrectwithsize
Apple Developer Documentation
developer.apple.com
'Xcode > IOS' 카테고리의 다른 글
| IOS) NSFetchedResultsController을 이용하자! (0) | 2021.01.12 |
|---|---|
| IOS) CollectionView에서 특정 Cell에 내용 넣기 In Code (0) | 2021.01.09 |
| IOS) Custom TabBar 만들기 in Code (0) | 2020.12.29 |
| IOS) Dynamic UIScrollView in Code (0) | 2020.12.25 |
| IOS) StoryBoard없이 Custom Navigation Controller (0) | 2020.12.24 |


댓글